Sign up for Lesson Plans, discounts & more!
The Rock Cycle Lesson Plan
Direct Aims of The Rock Cycle Lesson:
- To learn that rock is recyclable and the processes involved in rock recycling
- To become familiar with the names of the different types of rock
- To work with a model of the cycle to learn the basic elements
Indirect Aims:
- To experience cycle as a natural phenomenon
- To lead the student to questions regarding plate tectonics
Materials for The Rock Cycle Lesson:
- Colored paper model of the cycle (with corresponding arrows)
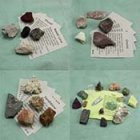
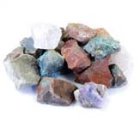
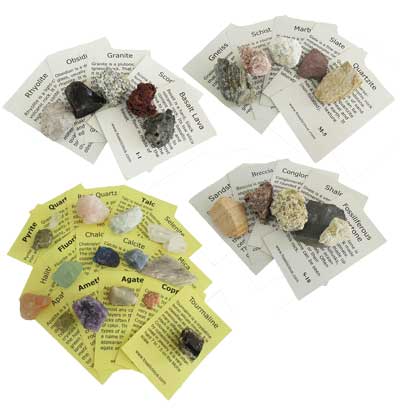
- Rock samples of each type (igneous, sedimentary, metamorphic)
The Rock Cycle Lesson
- Lay out the Red Igneous Rock Circle.
- Igneous Rocks are formed from the molten rock in the mantle layer of the earth.
- Igneous Rocks can form close to the surface of the earth as in a volcano or deep below the surface in pockets.
- Lay out the Lava.
- This is Lava. It was molten rock that cooled quickly on or near the surface of the earth. It came from a volcano.
- Lay out the illustration of a volcano.
- Lay out the Granite.
- This is granite. It was molten rock that cooled deep below the surface of the earth. It cooled slowly, forming different types of crystals as it cooled.
- Lay out the illustration of the underground pocket of molten rock.
- (Side bar for the teacher) Extrusive igneous rocks cool on or near the surface of the earth. Sometimes extrusive igneous rock is called volcanic. They come from vents in a volcano and tend to cool quickly. Lava is an example of this type of igneous rock.
- (Side bar for the teacher) Intrusive igneous rocks cool deep below the surface of the earth. Sometimes intrusive igneous rock is called plutonic. They come from pockets of molten rock that cooled as they moved toward the cooler upper layers of the crust. Granite is an example of this type of igneous rock.
- Lay out the Brown Sedimentary Rock Circle
- Sedimentary Rocks are made of small bits and pieces, or sediments, of other materials.
- The materials could be pieces of shell or ground up rock, anything that can be crushed or weathered to make tiny bits.
- The tiny particles fall to the ground and layer after layer are laid down on top of another. Eventually the weight of all the layers causes the tiny particles to be squashed very tightly together. Minerals glue the particles into a solid rock.
- Lay out the sandstone.
- This is sandstone.
- It is made of tiny sand particles that come from rock that has been broken down by either wind, rain, freezing, thawing, or running water: anything that weathers the rock.
- Lay out the limestone.
- This is limestone.
- It is made of the broken shells of sea animals.
- Lay out the shale.
- This is shale.
- It is made of layers of mud like lies at the edge or bottom of a shallow lake or inland sea.
- Lay out the gray Metamorphic Rock Circle.
- Metamorphic Rock is rock that has changed form due to pressure and heat.
- Metamorphic rock could have started its life as either igneous rock, sedimentary rock, or other metamorphic rocks.
- Lay out the Marble.
- This is Marble.
- One of the parent rocks that can become marble is limestone.
- Lay out the Quartzite.
- This is Quartzite.
- Quartzite is metamorphosed sandstone.
- Lay out the Slate.
- This is Slate.
- The parent rock of slate is shale.
- Lay out the red/brown arrow between the igneous and sedimentary circles.
- This arrow reminds us that igneous rock can become sedimentary rock.
- Weathering is the name of the process that breaks down the igneous rock.
- The tiny particles fall or wash to the ground and begin to pile up. (Add the cloud with rain.)
- With pressure these particles form sedimentary rocks
- Lay out the gray/brown arrow pointing from the metamorphic circle to the sedimentary circle.
- Weathering of exposed metamorphic rock, such as marble, creates sediments.
- Metamorphic rock could be weathered mechanically, as with wind.
- It could be weathered chemically. As water flows over the rock, it dissolves the rock and the chemical remains flows into the sea where it is absorbed by sea animals.
- Lay out the brown/gray arrow pointing from the sedimentary circle to the metamorphic circle.
- Sedimentary rock layers get buried deeper and deeper as more layers are piled on top.
- The lower layers are under extreme pressure and increasing heat.
- The heat and pressure changes the sedimentary rock into a new rock form such as slate, schist or gneiss.
- Lay out the brown/red arrow pointing from the sedimentary circle to the igneous circle.
- Sedimentary rock layers under the ocean sometimes get pushed deep under the edge of a continental plate.
- When this happens the heat and pressure cause the sedimentary rock to become molten magma.
- The molten magma becomes igneous rock when it cools quickly near the surface or slowly in underground pockets.
- Lay out the gray/red arrow pointing from the metamorphic circle to the igneous circle.
- Metamorphic rock can also get pushed under the edge of a continental plate.
- When this happens the heat and pressure cause the sedimentary rock to become molten magma.
- The magma will solidify as either volcanic or plutonic igneous rock.
- Lay out the red/gray arrow pointing from the igneous circle to the metamorphic circle.
- Some igneous rock can be changed into metamorphic rock.
- If it becomes buried under layers of other rock heat and pressure can cause it to change. Sometimes this is caused by mountain building.
- When this occurs, the granite or other igneous rocks, changes into a new form such as schist or gneiss.
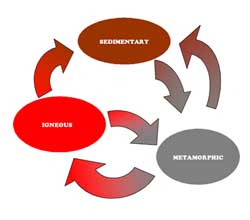
- Once the chart is complete, note the various cycles with the students:
- Igneous to sedimentary to metamorphic back to igneous or
- Igneous to metamorphic to sedimentary and back to igneous.
- Review the title of the chart (the Rock Cycle) and have the students explain why this is the title. Place the title above the chart.
Follow up work for The Rock Cycle Lesson
- Students may repeat the The Rock Cycle Lesson using the chart materials. Be sure to include a key so students can correct their work.
- As a follow up, students can draw the rock cycle or research different types of rocks that will fit in the various cycles learned in The Rock Cycle Lesson.
Download the PDF file here for Rock Cycle Lesson Materials
More Lesson Plans

INTERESTED IN MORE? IF SO, YOU MAY WANT TO CHECK OUT OUR OTHER SITES:
fossilicious.com - Our online fossil and mineral rock shop.
fossils-facts-and-finds.com - An educational site about fossils.